CHOCOLATE RICE KRISPIE BALLS
Everyone who likes peanut butter, please raise your hands! These rice crispy balls have everything a person might desire in a bite-sized treat and then some. One little rice crispy ball packed with a ton of deliciously sweet flavor. I dare you to eat only one…! You have worked so hard, and you should reward yourself by enjoying a couple of them. In only one mouthful, you get a crunch, a smoothness, and a chocolaty flavor. It really is rather lovely, don’t you think?
Two days ago, my sister visited, and while she was here, she brought over these incredible chocolate rice Krispie balls for us to enjoy. It took me a while to figure out what I was eating, but once I did, I couldn’t get enough of it. When she finally shared her recipe with me, I was shocked.
Sweet, uncomplicated, and delectable! These balls are really in a universe of their own! As soon as I got my hands on the recipe, I doubled it and put what I didn’t immediately eat into an airtight jar. You won’t be disappointed if you give it a go, I promise you that.
INGREDIENTS:
- Peanut butter; I used ½ a cup.
- Softened butter, I used 3 large spoons.
- 1 small spoon.Of vanilla extract.
- 1 Cup.Of Rice Krispies.
- ½ Cup.Of chopped pecans.
- 1 Cup.Of shredded coconut.
- Chocolate chips; I used 1 Pkg.
- Sweet chocolate; you only need one square.
PREPARATION:
- First Step: To begin, I mixed all the ingredients required to make the balls in a large mixing basin.
- Second Step: Once I had an incorporated mixture, I placed the bowl in the refrigerator for at least half an hour; preferably 1 to 2 hours.
- Third Step: After that, I rolled the chilled mixture into balls and placed it in the refrigerator for another hour to set.
- Fourth Step: Following that, I melted the chocolate chips and the sweet chocolate together in a double boiler, and coat the balls in chocolate one at a time by dropping them into the melted chocolate. It will be much simpler if you use a fork.
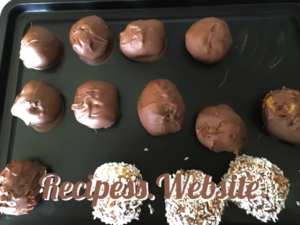
- Fifth Step: To finish, I put the balls in a single layer on parchment paper, and then I placed them in the freezer to harden.
Enjoy!