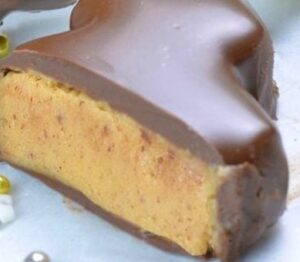
HOW TO MAKE CHRISTMAS TREES WITH HOMEMADE PEANUT BUTTER
If you’re a fan of Reese’s peanut butter cups, you’ll adore these “Peanut Butter Chocolate Christmas Trees,” which can be used to decorate holiday dessert trays or shared with loved ones all season long.
The adorable look of these peanut butter Christmas trees is just one of their many appealing qualities; they are also quite addicting, and I really wish someone would keep them hidden from me. During this holiday season, you just cannot go without these peanut butter cup Christmas trees.
To give the impression that these delectable sweets are adorned with colorful decorations, you may decorate your peanut butter and chocolate Christmas trees by drizzling them with melted white or dark chocolate, or you can use colored icing writers and sprinkles instead. In any case, they are an undeniable success among young people as well as older people and should not be overlooked. Make sure to include this recipe for a no-bake peanut butter tree on your must-make list along with the rest of your Christmas baking.
YOU’LL NEED:
THE PEANUT BUTTER FILLING INGREDIENTS:
½ Cup.Of salted butter – melted.
2 Cups.Of creamy peanut butter.
¼ Cup.Of granulated sugar.
1 Tbsp.Of vanilla extract.
4 Cups.Of powdered sugar.
THE CHOCOLATE COATING INGREDIENTS:
3 Cups.Of semi-sweet chocolate chips.
2 Tbsp.Of shortening
PREPARATION:
Step 1:
Prepare a half-sheet pan or a jelly roll pan by lining it with parchment paper and setting it aside.
Step 2:
In a mixing bowl, combine the melted butter, peanut butter, granulated sugar, and vanilla extract. Use either a hand mixer or a stand mixer to combine these ingredients until they are smooth and creamy.
Step 3:
In a separate bowl, combine the peanut butter and powdered sugar. Beat until combined. Place the butter mixture, which will be crumbly, in the jelly roll pan that has been previously prepared.
Step 4:
Spread the dough out to a 1/2-inch thickness in the sheet pan and press it down. Put the sheet pan in the freezer for about a quarter of an hour.
Step 5:
Remove the peanut butter layer from the fridge by lifting it out of the pan using parchment paper. Place a new piece of parchment paper onto the baking sheet.
Step 6:
To make Christmas tree forms from the cooled peanut butter layer, use a cookie cutter in the shape of a Christmas tree and cut out the shapes. Cutouts should be arranged on a baking sheet coated with parchment paper. Freeze for 30 minutes.
Step 7:
Scoop up any leftover peanut butter mixture, squeeze it to a thickness of half an inch, and cut out any more forms you need. Prepare the chocolate coating once the cutouts have been refrigerated for twenty-five minutes.
Step 8:
In a microwave-safe dish, melt 2 tablespoons of shortening with milk chocolate chips. To melt chocolate in a microwave, heat it for 30 seconds at a time and stir it until it is totally melted and smooth.
Step 9:
Lift one peanut butter cutout at a time with a fork, and cover it fully with the melted chocolate. Repeat with the other cutouts.
Step 10:
Once you have removed any extra chocolate from the cutout, set it back on the baking sheet. If the peanut butter mold melts fast, you may need to work in batches. Let the chocolate cool and harden.
Recipe note:
You can decorate them whatever you want, then just cover them and keep them on the counter or in the refrigerator for up to seven days. Freeze for up to three months, but be aware that the color of the chocolate may change during this time. Before serving, let the food defrost in the refrigerator.