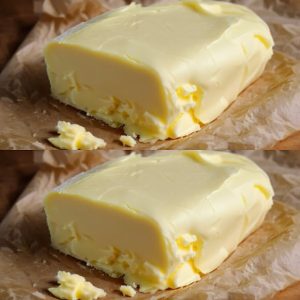
Homemade Butter: One Ingredient Wonder!
In a world where convenience often trumps quality, there is something incredibly rewarding about making your own food from scratch. Among the myriad of culinary delights that can be prepared at home, butter stands out as a simple yet transformative experience. With just one primary ingredient, you can create a product that is not only fresher and more flavorful than anything you’ll find on the grocery store shelves but also healthier and more economical.
Making your own butter at home harkens back to a time when households took pride in crafting their own food, ensuring that every meal was made with the utmost care and the best ingredients available. In modern times, this practice has been largely overshadowed by the convenience of pre-packaged foods. However, the benefits of homemade butter are too significant to ignore.
Why Make Your Own Butter?
Healthier Option: When you make butter at home, you control the ingredients. Choose high-quality cream, such as organic or grass-fed, to ensure there are no additives or preservatives.
Cost-effective: Buying cream in bulk or when it’s on sale can make homemade butter cheaper than store-bought.
Delectable and Fresh: Freshly made butter has a richness and flavor that surpasses anything you can find at the store.
Ingredients and Equipment
2 cups (one pint) of heavy cream: For the best health benefits, opt for organic or grass-fed.
Optional: A pinch of salt for flavor.
Equipment: A stand mixer, hand mixer, food processor, or even a mason jar if you prefer a workout!
Step-by-Step Instructions for Making Homemade Butter
Step 1
Pour the Cream: Start by pouring the heavy cream into a large mixing bowl or the bowl of your stand mixer.
Step 2
Set your mixer to medium-high speed and whip the cream for about 10 to 15 minutes until it first turns into whipped cream and then separates into butter and buttermilk.
Step 3
Separate Butter and Buttermilk: Once separated, pour out the buttermilk (save it for baking or cooking!).
Step 4
Rinse the butter under cold water, pressing and squeezing out as much buttermilk as possible to extend its shelf life.
Step 5
Season and Store: Add a pinch of salt if desired and mix well. Shape the butter using parchment paper or transfer it to a clean container. Refrigerate to store.
Please Head On keep on Reading (>)
